Halloween Cupcakes and Skeleton Brownies

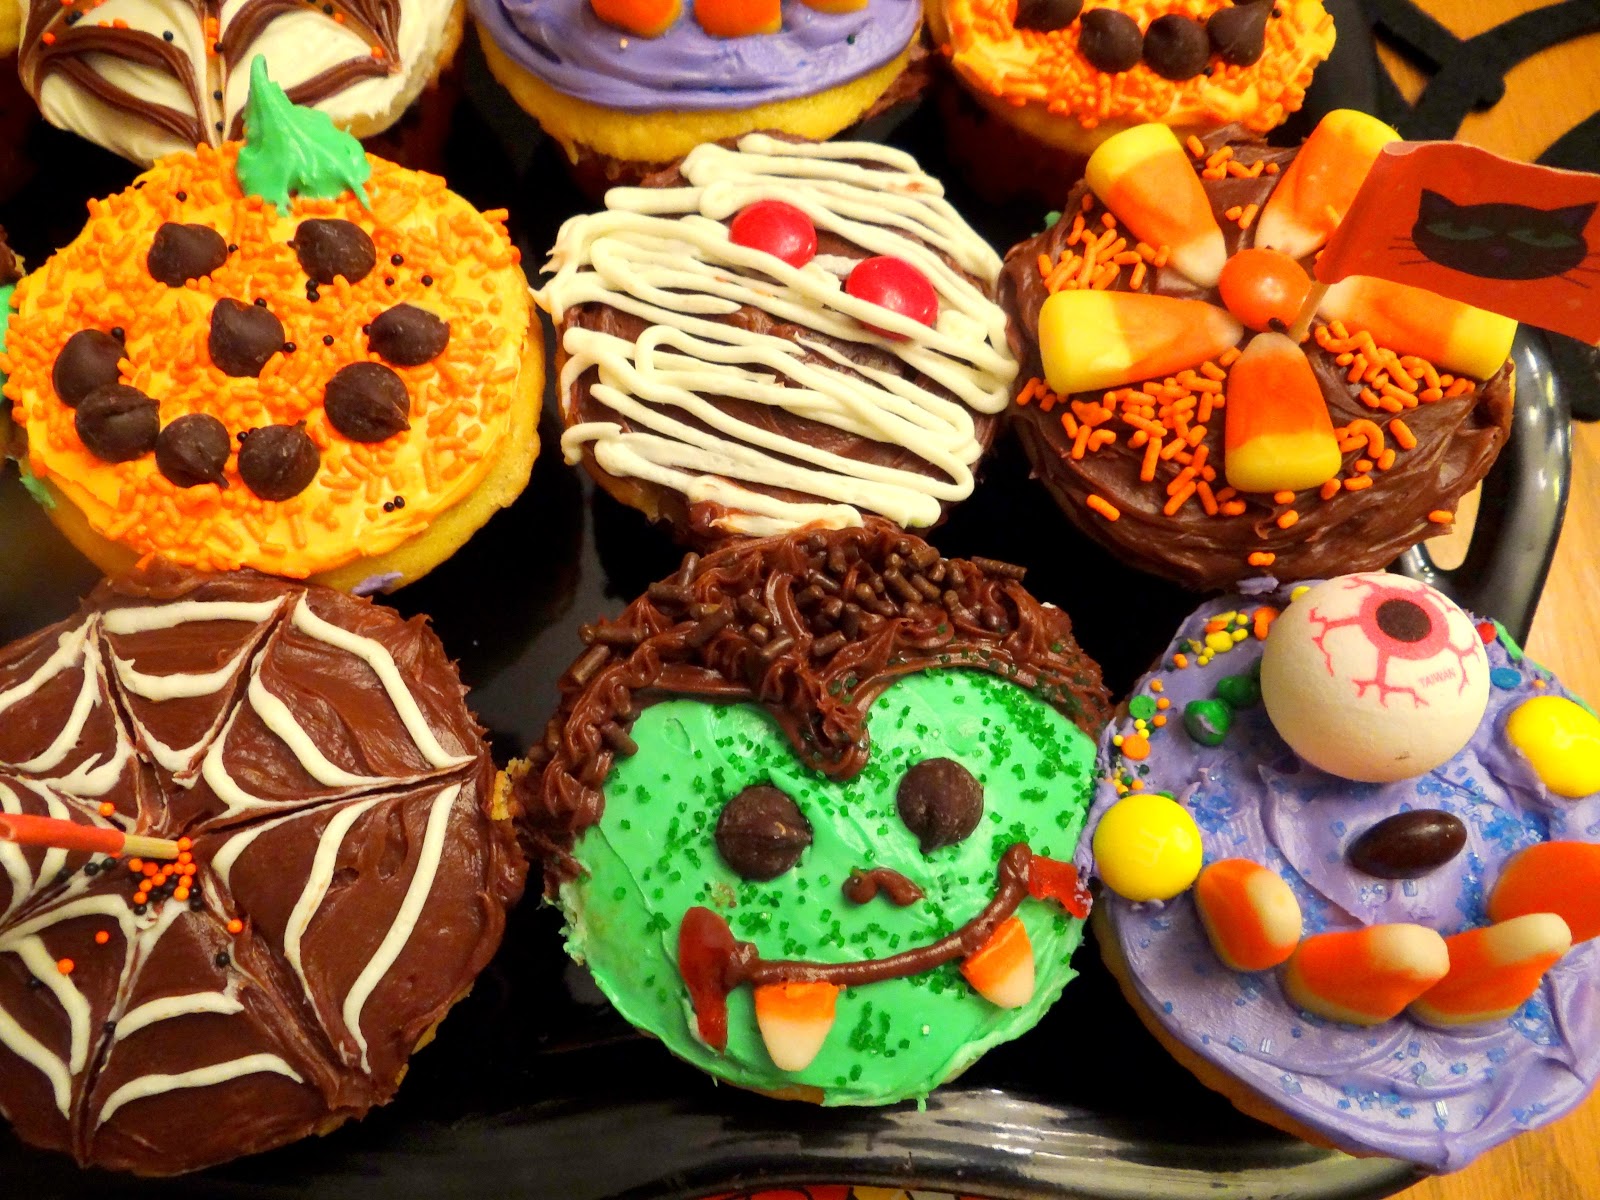
Halloween Cupcakes; pumpkin cupcakes and vampire cupcakes too! 
I played around decorating some cute Halloween Cupcakes for a party I was going to. 
I had about 7 different designs on my Halloween Cupcake treats. 

        It was fun to make the “Purple People Eater” cupcakes with little eyeball superballs.

Halloween brownies made to look like skeletons were made from pretzels 

 My favorite Halloween treats were these brownie skeletons made from white chocolate disks for the heads and yogurt covered pretzels for the bodies. I had to put chocolate icing on the walnut brownies too.I added pretzels and white chocolate candy melts for the faces. The rest of the body I used just white buttercream icing and made the legs and hands with a pastry bag and a decorator icing tip.

Halloween Cupcakes…the spiderweb cupcakes and pumpkin cupcakes were super easy! 

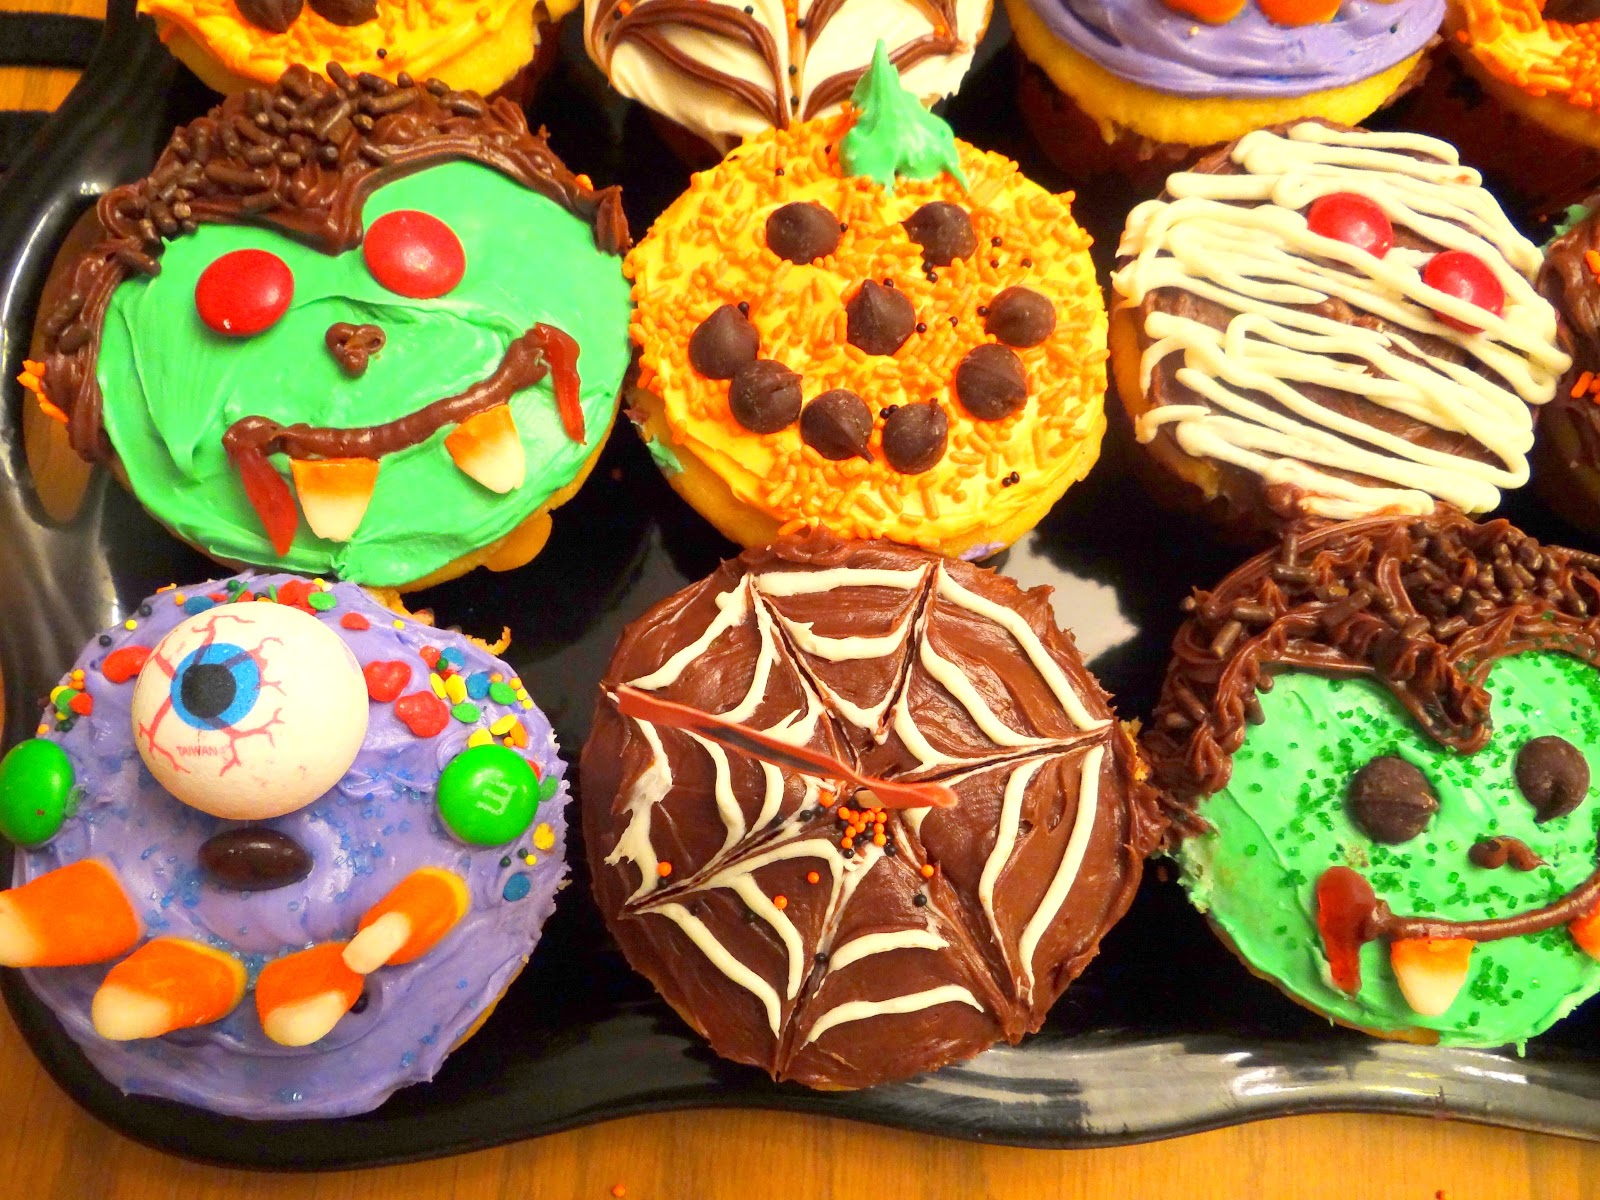
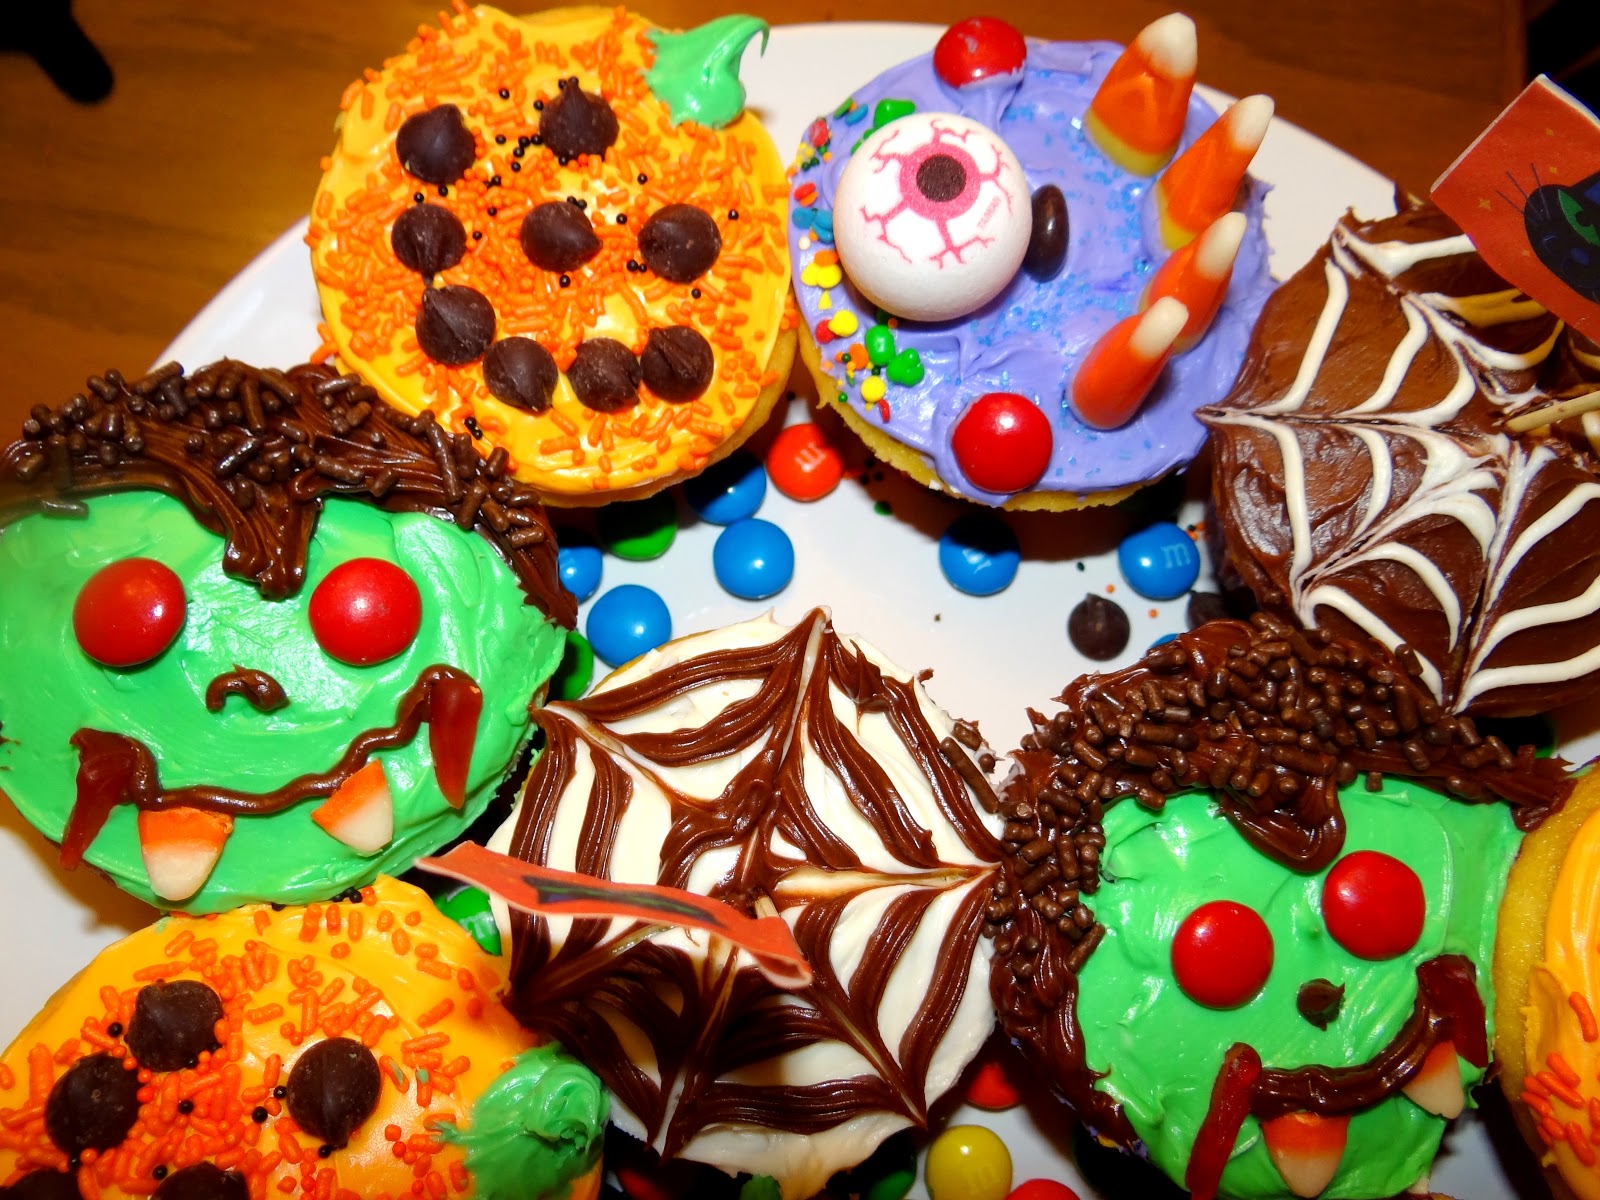
Here is a plate of my finished cupcakes. Love the chocolate vampire cupcakes with M & M eyes and candy corn teeth. The bloody smiles are made from red fruit snacks cut into strips.

I had some spider rings at school I added to the spiderweb cupcakes but forgot to take pics afterwards. The mummy cupcake was super easy with M & M eyes

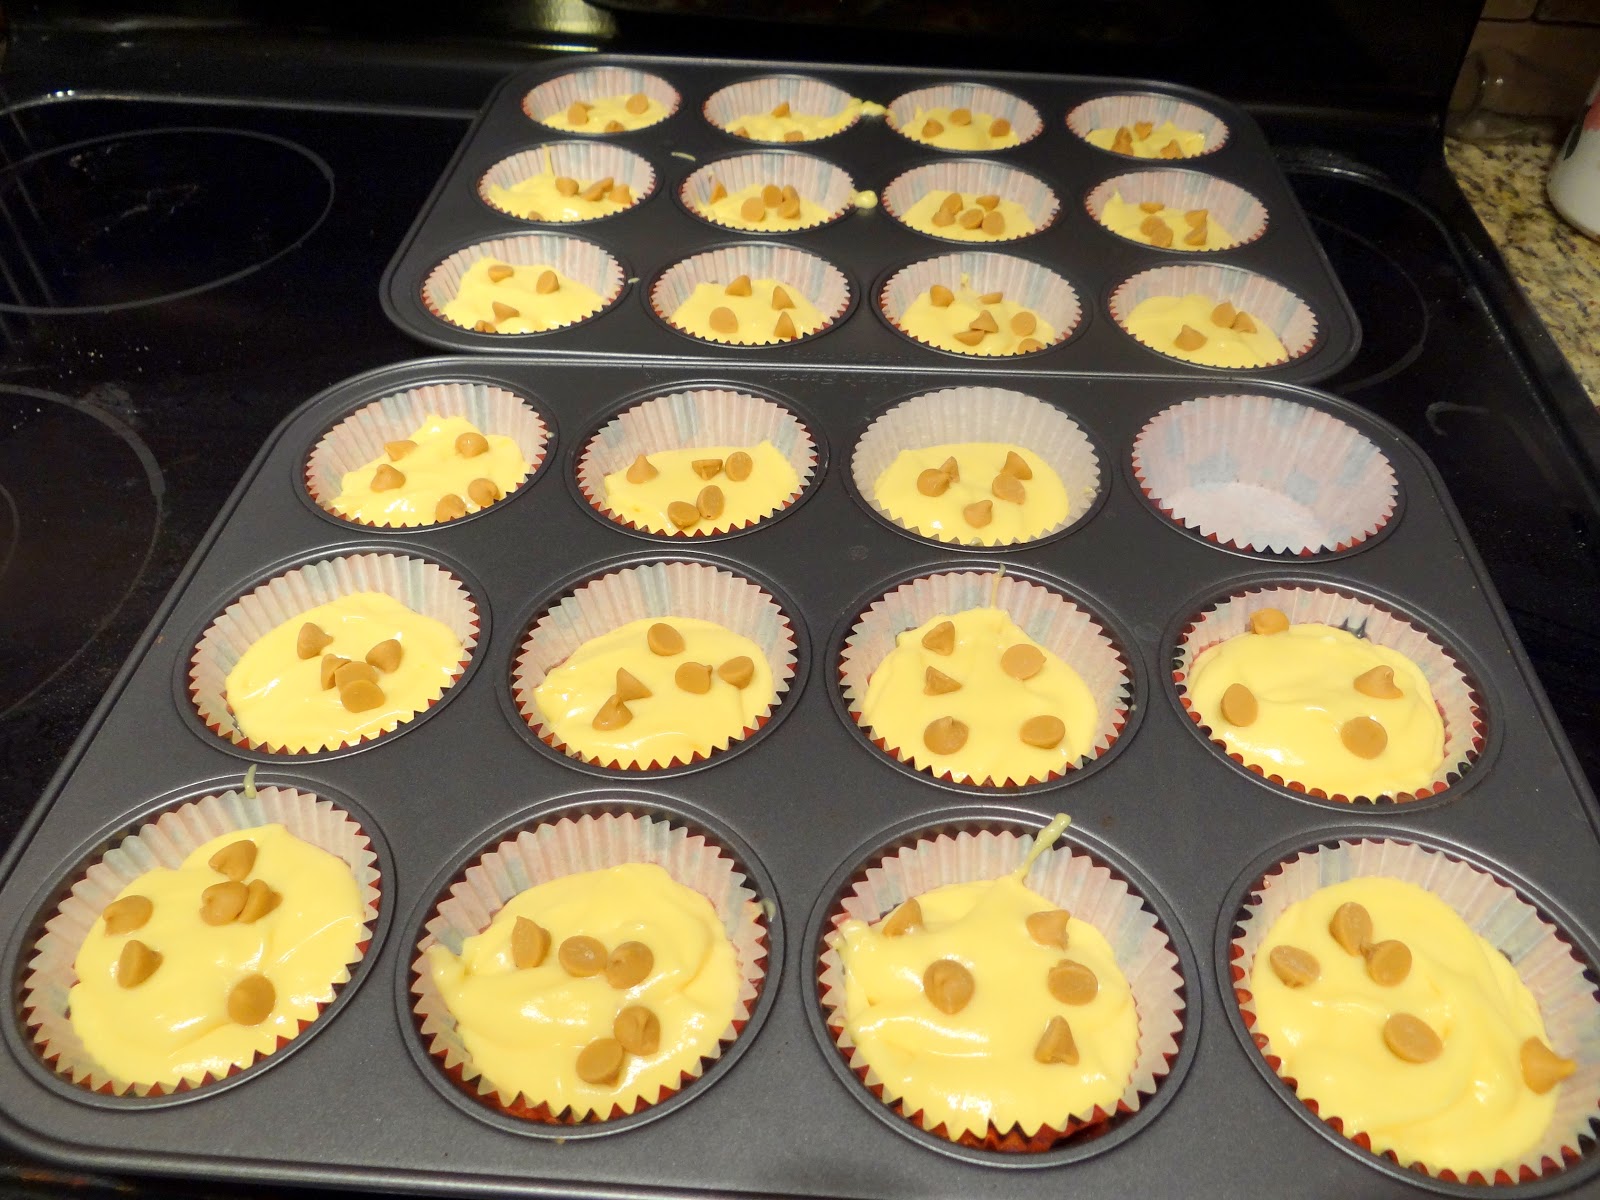
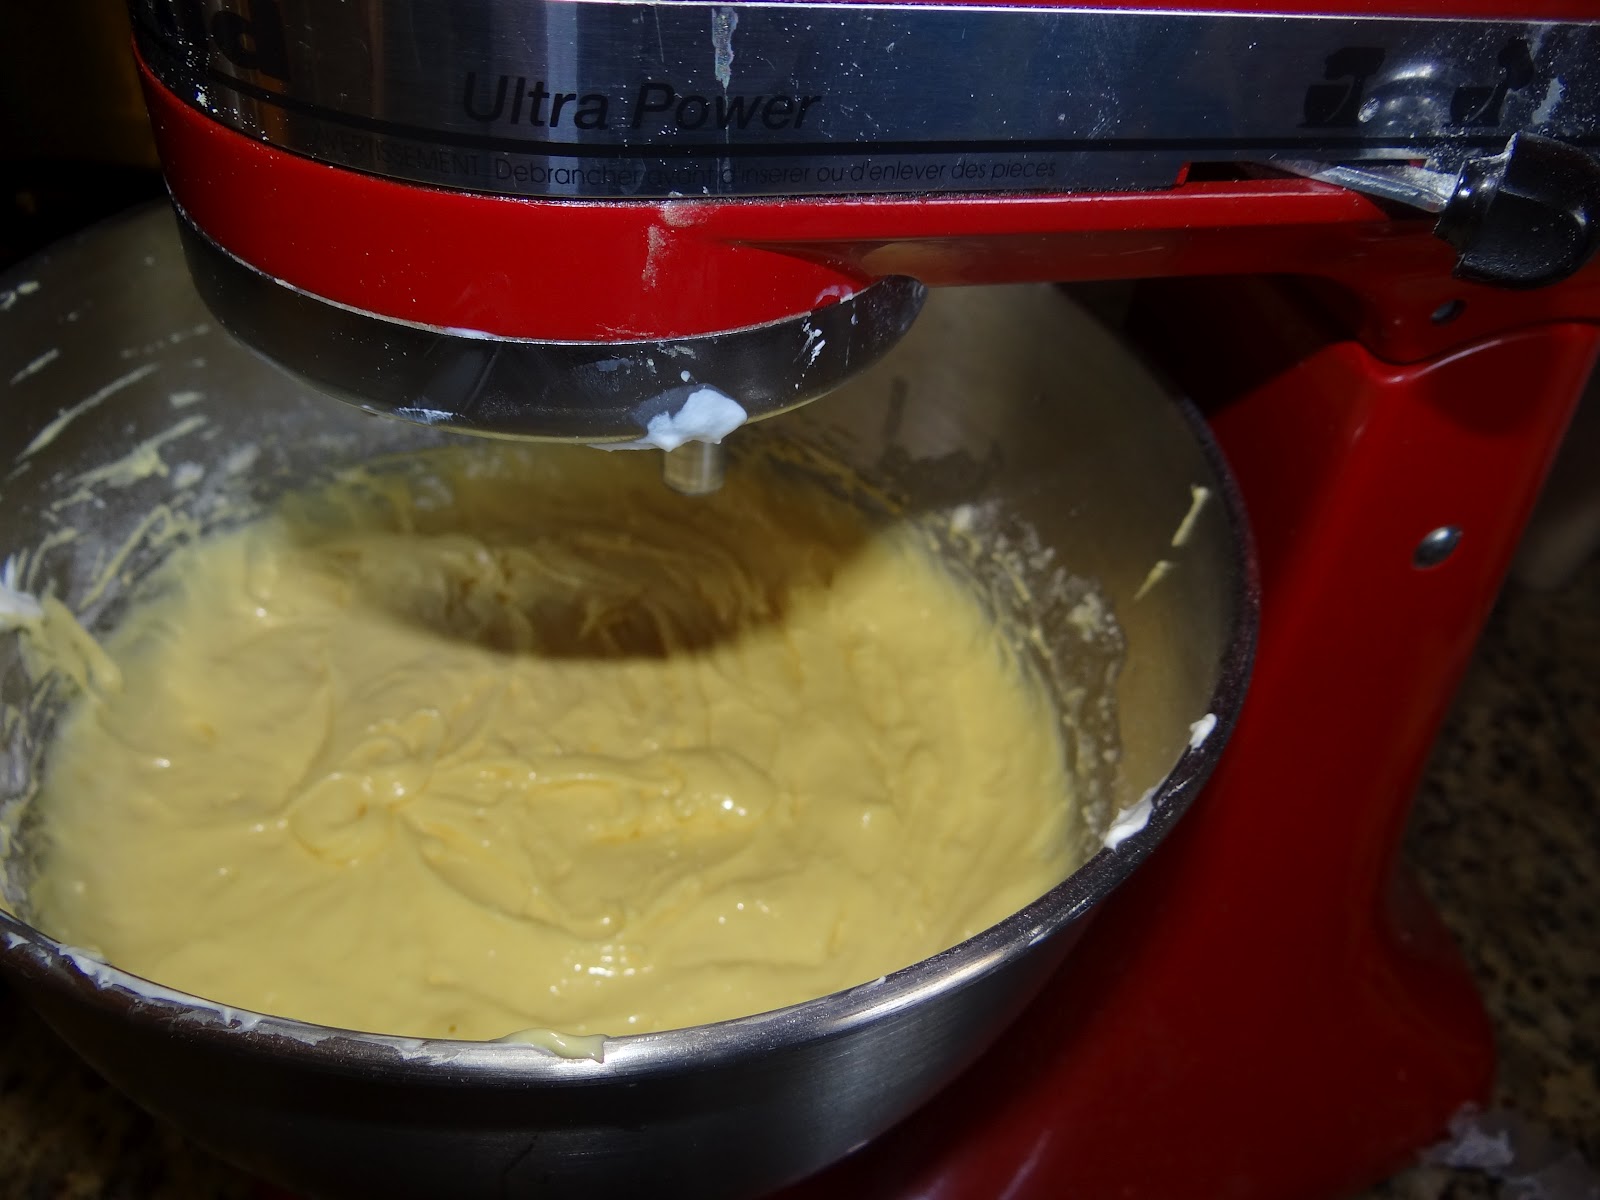
 I added a small box of vanilla pudding, 3/4 cup of sour cream and some butterscotch chips to the batter of the cupcakes. I also added half melted butter, instead of 1/2 the oil. It just tastes better. I hate cupcakes where I can taste the oil! Yuck!

 Finished Halloween cupcakes and treats on top. They were very colorful and very yummy too.

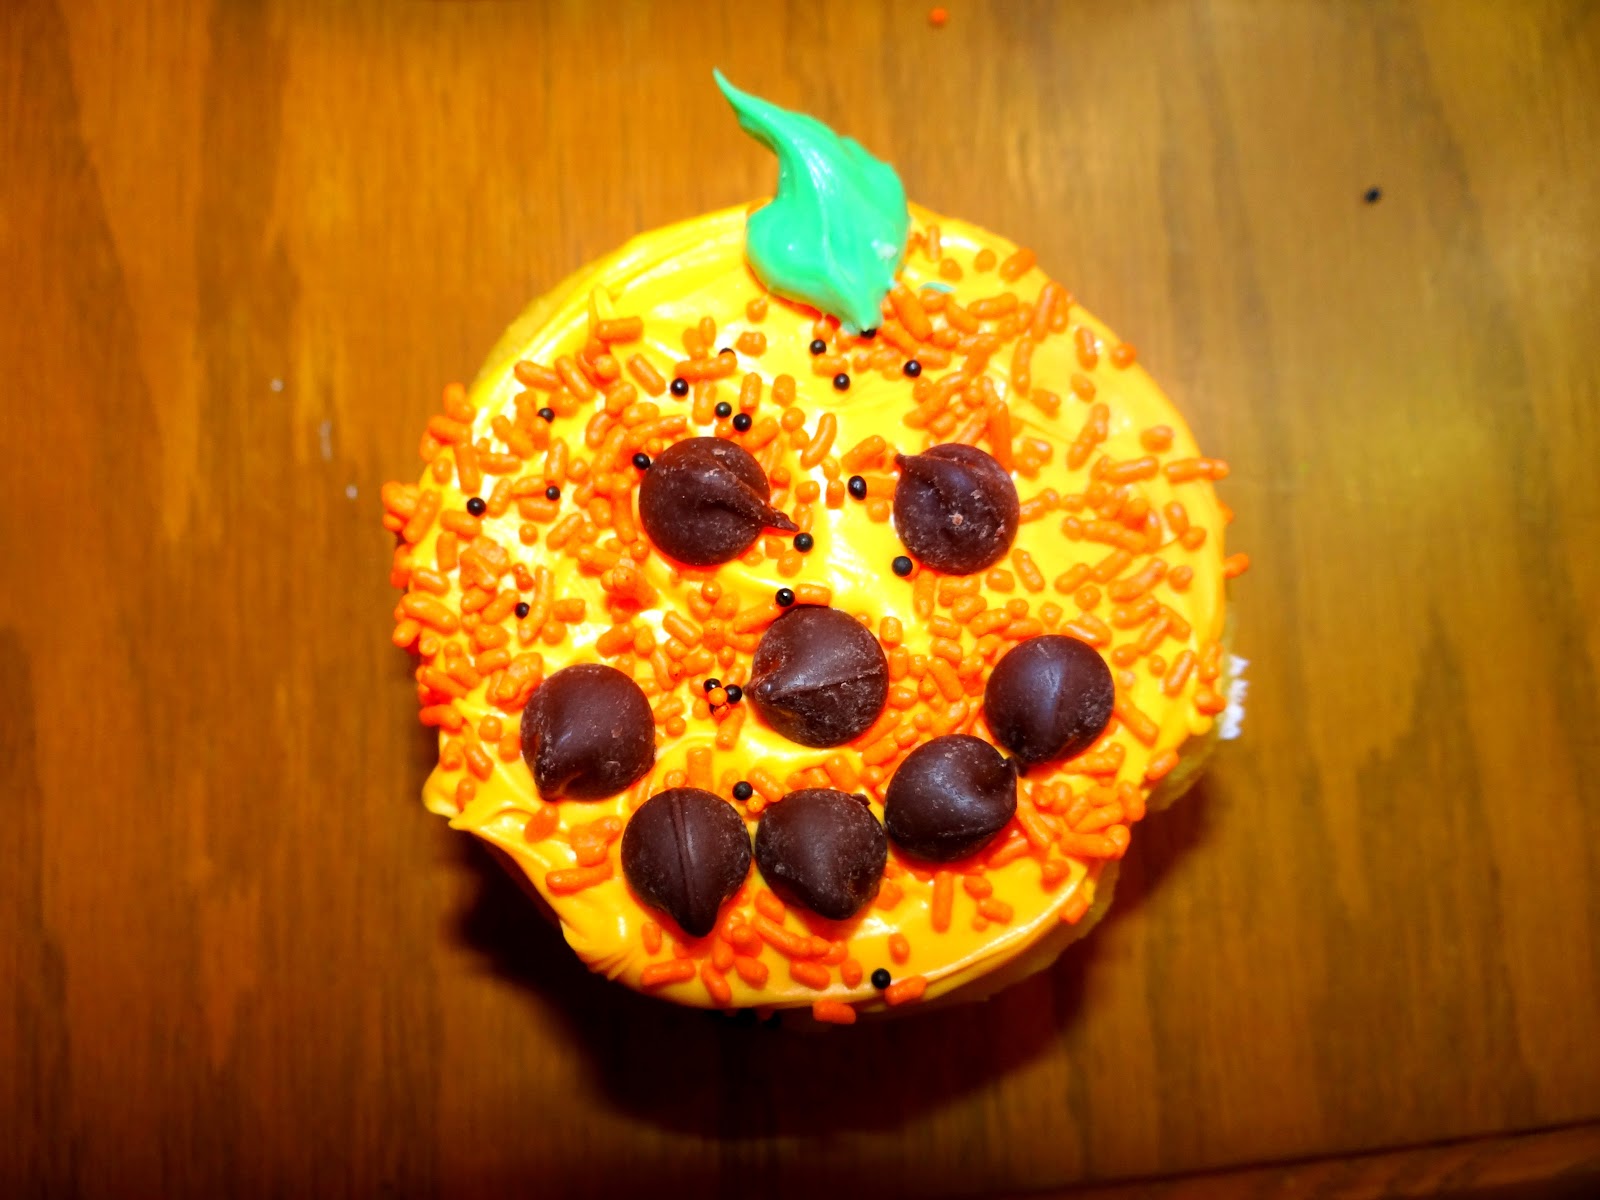
Cute Pumpkin Halloween Cupcakes

 The easiest Halloween cupcakes were the spiderwebs and pumpkins. Just chocolate chips for the jack-o-lantern faces. I  just added chocolate chips for the face and some pretty sprinkles over the orange and green icing.

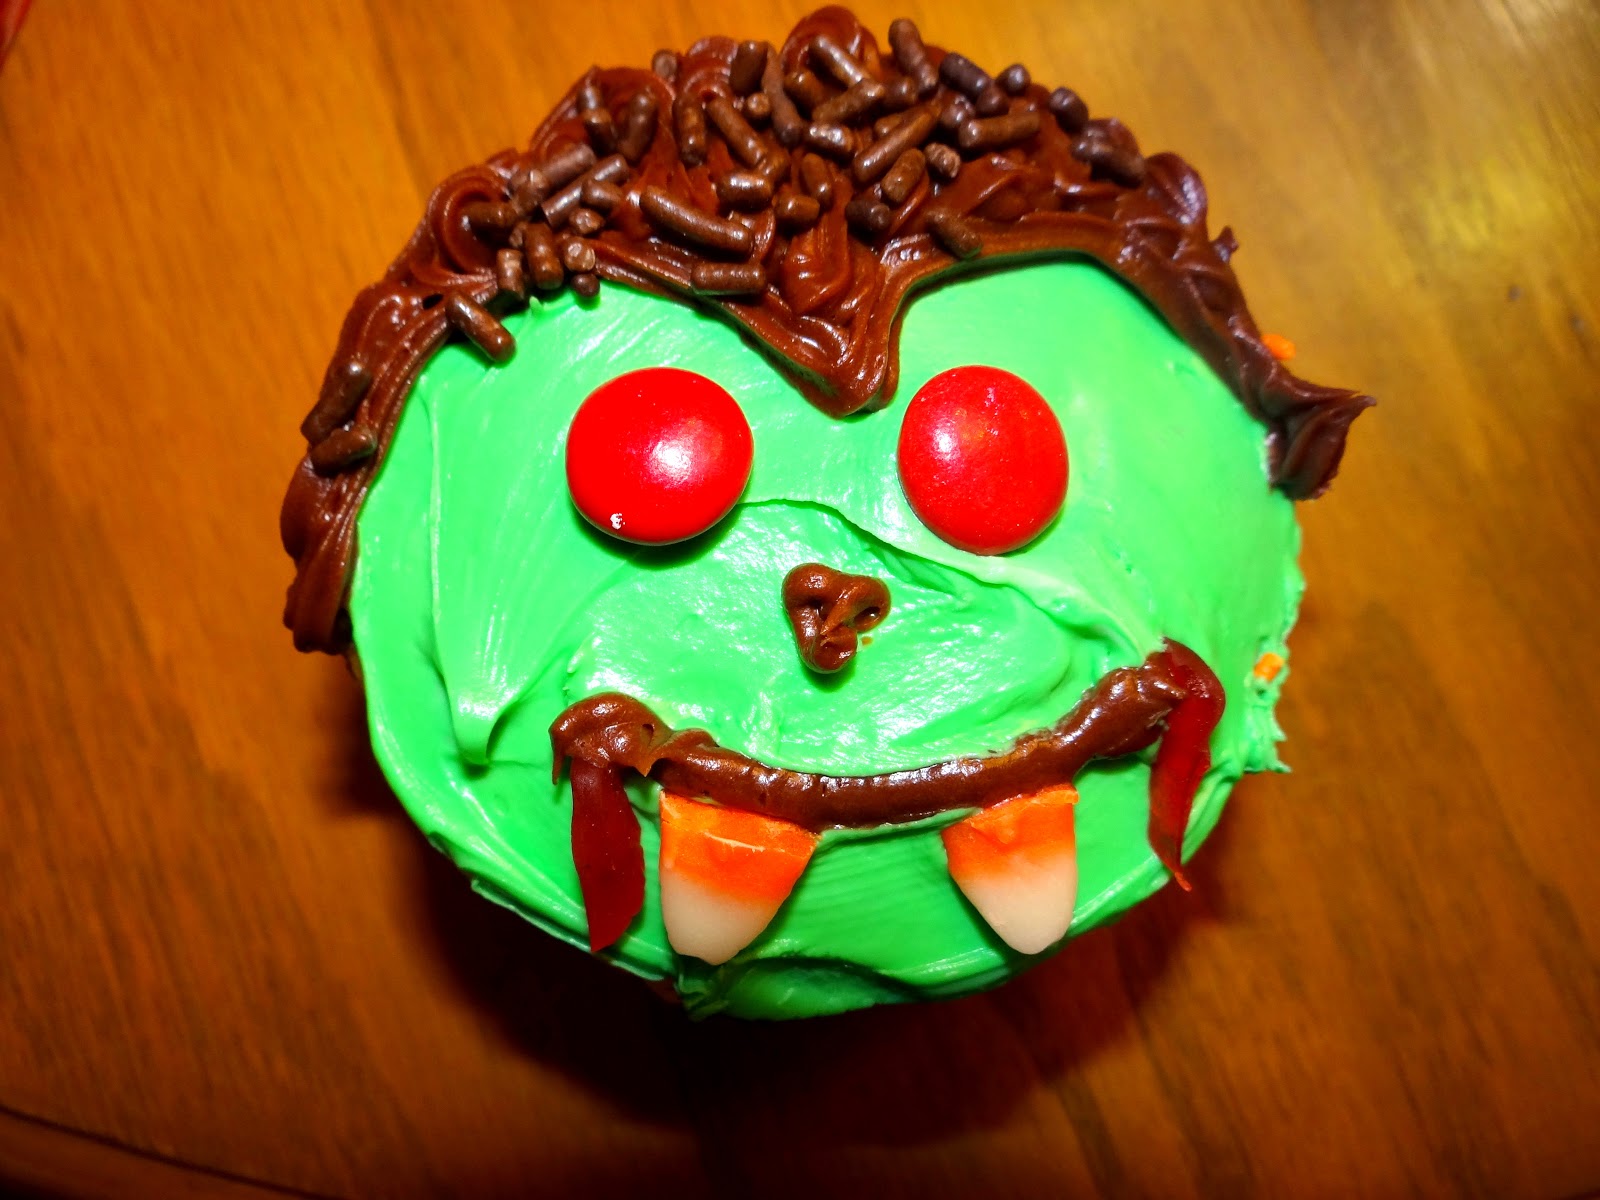
Creepy Vampire Cupcakes for Halloween….super CUTE! 

This vampire cupcake was so cute. I thought it turned out cute with the brown sprinkles for the chocolate iced hair, and the M & M eyes. I made some eyes brown chocolate chip eyes  too. I couldn’t decide which one looked better.

Halloween Cupcakes! Lots of mummies, ghouls and spiderwebs! 

Notice the 2 colors of spiderweb cupcakes too. I think they both look really pretty. It would be a cute plate to just have the 2 flavors of spiderweb cupcakes for a party.

Gotta love a purple people eater cupcakes! 

 I also made a pan of brownies too. They were skeleton brownies. I added candy corn to the square brownies.

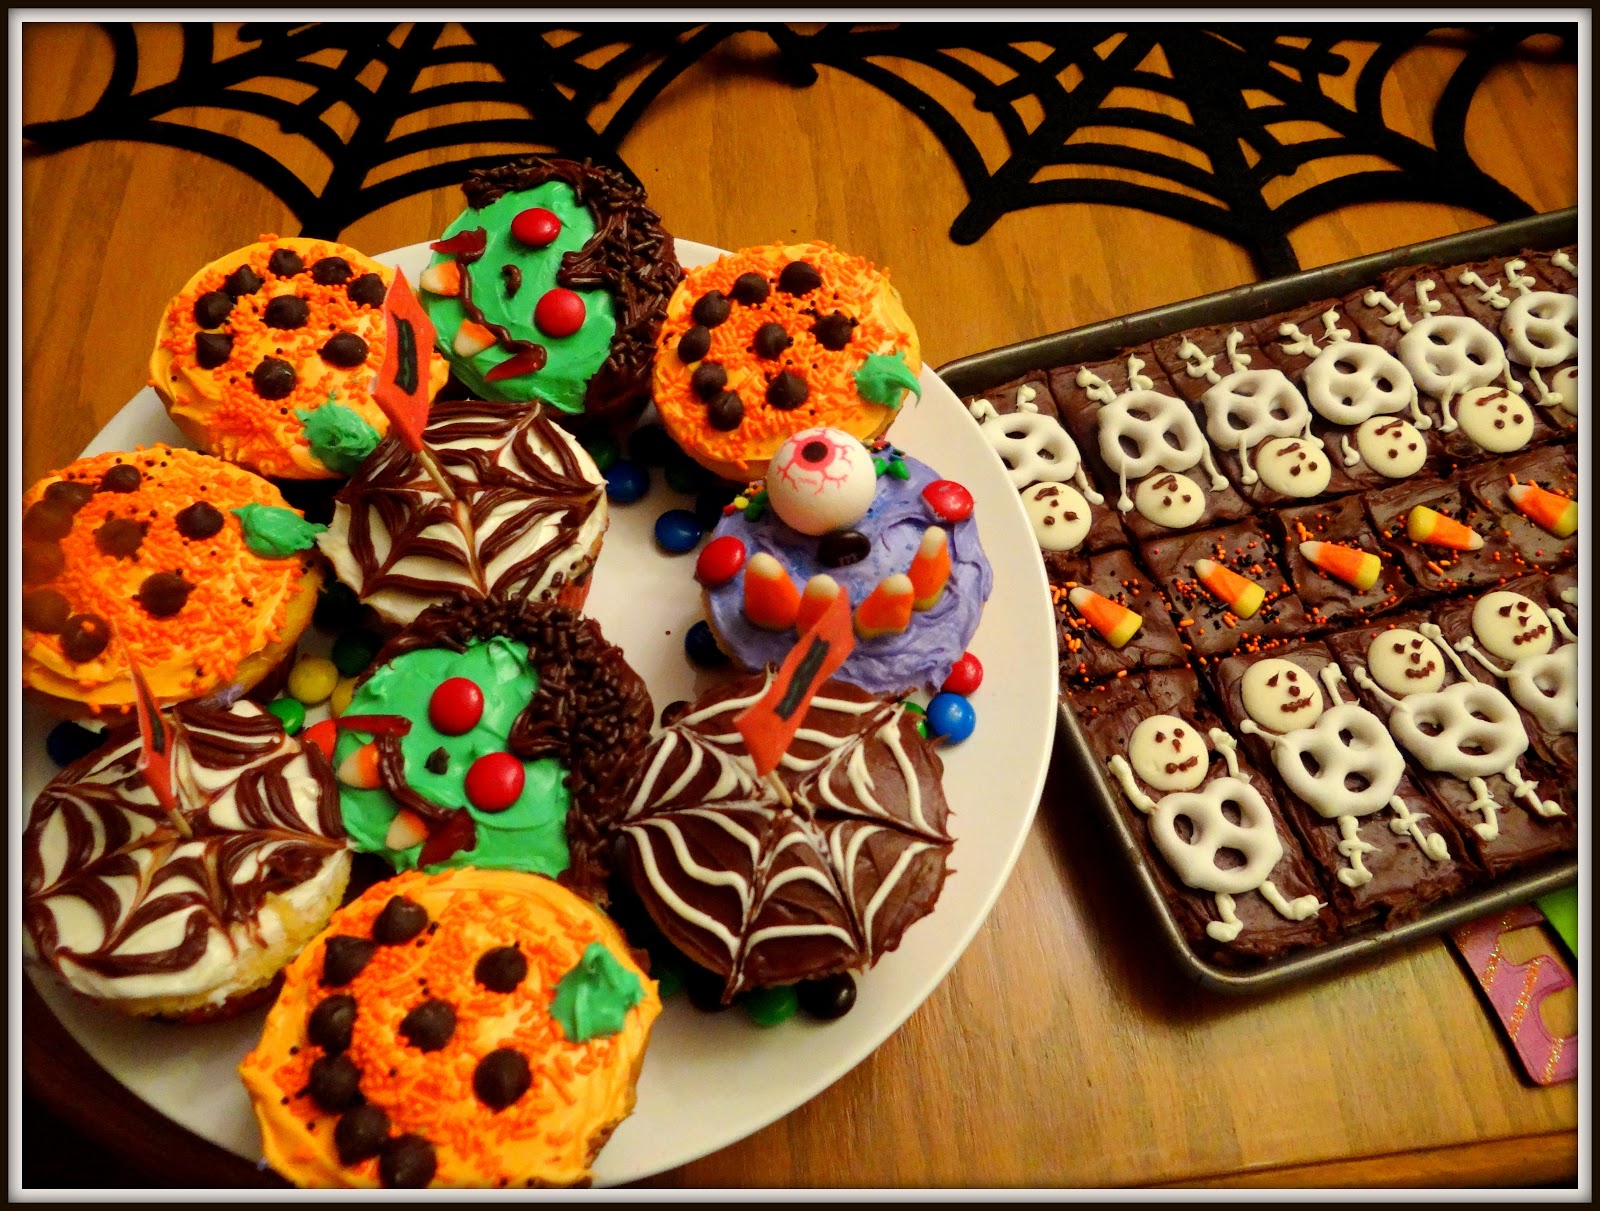
Skeleton Brownies were my favorite, and super easy too! 

 Check out all the sweet treat fun! I got a lot of inspiration from looking on Pinterest at cute treat ideas I could try. I love peanut butter cookies. I’d do the pumpkin kisses with peanut butter cookies instead of brownies.

Pumpkin Kiss Brownies at Daily Food Buzz are cute. 
At Food.Daily Buzz is the recipe for these cute yummy things. 

These Halloween Brownies are super cute. And they were super easy.  I love a mint flavoring for the icing and then I would tint the icing mint green. It looks so fun  like cute little Frankenstein and jack-o-lantern faces!

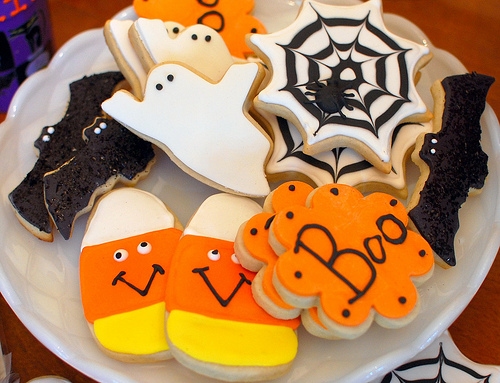
Here at Tidymom.net is a bunch of really sweet cookies to decorate for Halloween. I love the Spiderwebs and Candy corn coothe best! But it is the assortment that really makes the white serving plate look special!  
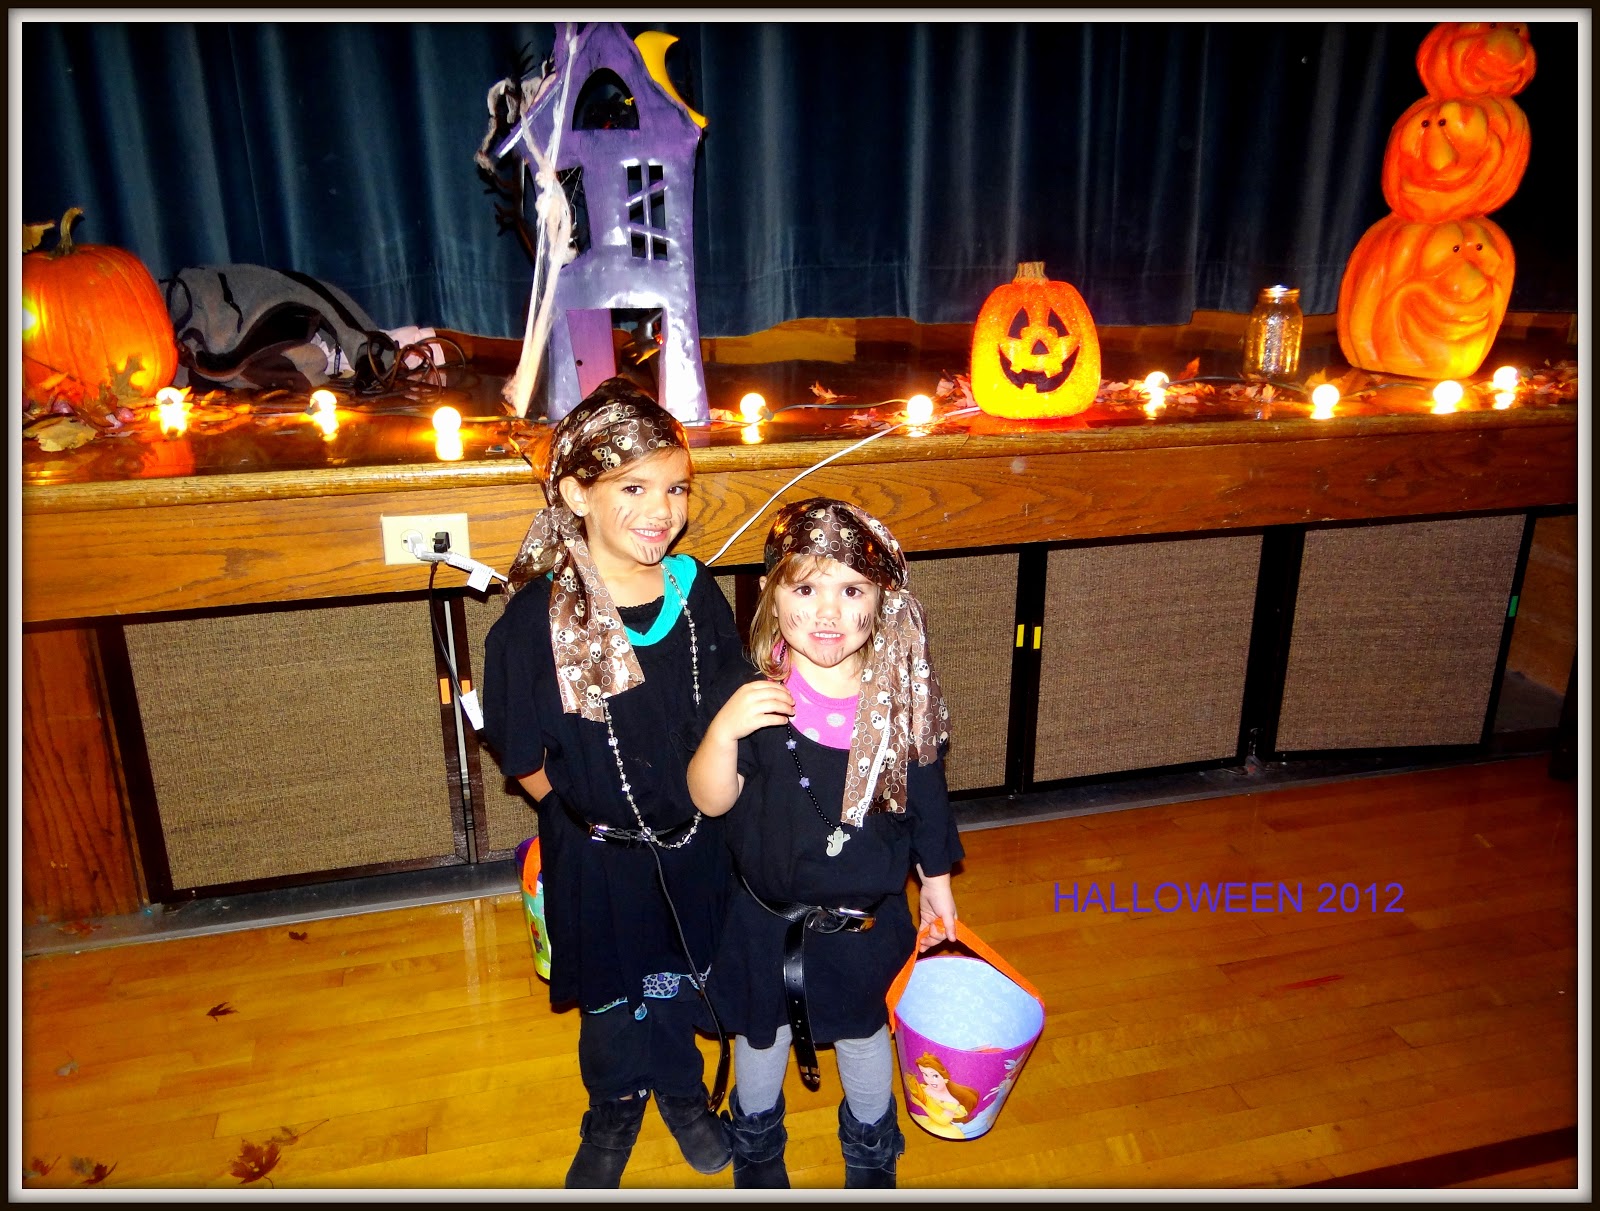
Here are my 2 little pirates at the Halloween Party. Argh! Matey! Have a Happy Halloween!

Pineapple Upside Down Cake with Toasted Pecans

Do you like an easy and yummy dessert? Like right now easy? When I want easy I always make this one….it takes a few minutes to put together…and it is soooo worth it!

I LIKE pineapple and marachino cherries….
 I love desserts with fruit in them….

And I LOVE Pineapple Upside Down Cake….yum! 

I just doctor up a yellow cake mix by adding a cup of sour cream, a small vanilla pudding,  and a few other things….

Ingredients and Recipe


  • 1 (18.25 ounce) package yellow cake mix
  • 1 (5.9 ounce) package instant vanilla pudding mix
  • 1 cup sour cream
  • 1 cup vegetable oil
  • 4 eggs
  • 1/2 cup warm water

Nuts make anything tastier…mmmm…..

Then I spray a cake pan (glass, oval shaped) with Pam and pour 1/2 cup brown sugar, 1/4 cup melted butter  and some chopped walnuts.
Line Pan with…..
1/2 c. brown sugar
1/4 cup butter melted
1/2 cup to 3/4 cups walnuts

Brown sugar and the walnuts…don’t forget to dot them with pieces of butter…..

Then after mixing up the cake mix….I decorate that nutty, sugary pan with the rings of pineapple….

 Then dot the insides of the pineapple with marachino cherries.  They add the really pretty touch to the dessert. Then pour the cake mix on top and bake for 30 to 35 minutes on 350.  It is super easy!

Mixing up the yellow cake mix batter……
Adding the extra oil, sour cream and pudding to the mix……


All those nuts and the brown sugar and butter make it a decadent topping for your yummy pineapple cake! 

Bake up that baby!  
Here it is just out of the oven….The sour cream and pudding mix make the batter really rich and tasty! 

Try to include a ring and a cherry in each serving for a great presentation….
This is one of my husband’s favorite desserts! 

Chicken Pasta Soup with Fresh Garden Veggies

Chicken Pasta Soup with Fresh Garden Veggies….easy and yummy. 

 Chicken Pasta Soup with Garden Veggies 

It was a beautiful summer evening tonight so we went down to the jacuzzi with our Chrome Books and towels and sat and soaked up all the sounds of crickets and birds and the other end of summer noises.

We have a little family of quail living in our backyard. It is fun to watch the mother quail freak out when she sees us coming down the hill to our backyard pond and jacuzzi. I got to see her babies flutter back under the bushes when we walked past.

I had some corn on the cob boiling too. I sliced some fresh tomatoes and peaches and we had a healthy feast after reading the paper on our laptops, listening to the pond waterfall sounds, and the birds chirping and watching the sun go down. AHHHH….THAT’S THE LIFE! 

Here is my quickie recipe for Chicken, Veggie and Pasta Soup
1/2 cup sauteed onion
1/2 cup sliced carrots
3 stalks celery
Corn from 2 corn on the cob
shell pasta
Johnny’s seasonsing salt and pepper
A few shakes of lemon pepper
Rotisserie Chicken cut into cubes
1/4 teaspoon parsley flakes
1 can of Swanson Chicken Broth
1 1/2 cups water (or more if you like)
1 can cream of chicken soup.

Put all of the ingredients in a stock pot and simmer it all together for about 20 to 30 minutes or so till veggies are tender. Eat with crusty french bread and real butter. It’s an easy and healthy summer meal.

Chicken Pasta Soup with fresh garden veggies…..SO GOOD! 

Green Chile Chicken Enchiladas

I had all these ingredients and I wanted some Mexican food. I had some leftover shredded rotisserie chicken. So I decided to make some Green Chile Chicken Enchiladas.

Wouldn’t you LOVE some Green Chile Chicken Enchiladas tonight? Mmmm….

Green Chile Chicken Enchiladas are really easy and quick. And for taste, they are one of my favorite dinner menus!! But I’m a Mexican Foodie. I love anything south of the border!

Green Chile Chicken Enchiladas – you can use the small flour tortillas to make them for a crowd!

GREEN CHILE CHICKEN ENCHILADAS 

2 1/3 cups chicken shredded
1/2 large onion diced
1 can Cream of Chicken Soup
1/2 packet of Taco seasoning
3/4 cup fine chopped salsa
1 can Niblets corn drained (optional)
1 small can diced green chiles
a few shakes of Johnny’s Season Salt
a few shakes of cumin
 3/4 cup sour cream (add last half hour)
1/3 cup milk or cream 
shredded jack or cheddar cheese (I like Jack Cheese best for these)

My Ingredients List for Green Chile Chicken Enchiladas….super easy! Add Niblets corn if you need to feed even more people!

Cook chicken and shred it up. Then add the 3/4 cup sour cream, chiles, salsa and spices. Add milk or cream and the soup to  the filling.  Add sauteed onions and taco seasoning packet (1/2 pkg.)

Roll up the Enchilada filling topped with a bit of shredded cheese.

Taste and season if needed.  Spoon the filling into 8 to 10 flour tortillas. Add some grated jack cheese and then roll them up. Top with cheddar cheese. Bake 30 minutes at 350 covered with foil. When ready to serve, top with a slice of avocado, if desired. Makes 8 to 10 enchiladas.

Serve your Green Chile Chicken Enchiladas with a salad and Chips with Salsa.

These are great to bring to a potluck or for a party. Just use the smaller flour tortillas to make double the recipe if you are serving lots of other foods. They will make mini enchiladas! I always get compliments on them! 

Pork Chops in Mushroom Gravy


Breaded Pork Chops in Mushroom Gravy….chicken fried!

PORK CHOPS IN MUSHROOM GRAVY
4-6 pork chops
A few shakes of  Lawry’s Season Salt
A few shakes of pepper.
1 cup flour
1 egg
1 cup Italian Seasoned Bread Crumbs (optional for more of a coating)
Roll chops  in egg then in flour. Then repeat for a thicker coating or dip in bread crumbs if you want a crispy, thick coating. I just lightly floured mine after dipping in a whisked up egg. 

Pork Chops in Mushroom Gravy…..better than a pork chop on a stick! 

My hubs and I once went to a family reunion in Iowa to see all my relatives who are farmers back there. While we were there the Iowa State Fair was happening so we went to see one of the greatest State Fairs in the whole U.S.A. My hubs best memory? Eating a pork chop on a stick! He LOVES his pork chops. I love this recipe for cooking them. It is a great one to do with mashed potatoes because the gravy is so delicious you will lick it off your fingers, I promise!

I just did a light flour dusting this time on my Pork Chops in Mushroom Gravy.If you like them with a thicker breading, just leave them setting in the flour for 10 minutes then season them and fry. The more flour, the thicker the breading is. 

 Bread the pork chops with egg mixture, dip very lightly in flour, and season with Lawry’s seasoning salt and pepper.Then fry them up in some canola oil.

You could also bread them heavily in egg, then flour, then egg then flour again if you like that crispy chicken fried style of pork chop breading. I’ve done it both ways.

Then blot the excess canola oil from your pork chops dry on a paper towel.
Makes servings Adjust Recipe (Help
Put them in a 9 x 13 pan sprayed with Pam. Then put them in the oven on 300 for 45 minutes covered with foil.  

While they are baking in a foil covered pyrex 9 x 13 pan mix up the mushroom gravy with 1 can of Cream of Mushroom Soup, 1 cup of sour cream, 1/4 cup cooking white wine, and 3/4 cup milk, 1/2 cup sauteed mushrooms, and then season with pepper and a few shakes of Lawry’s Seasoning Salt. I have used thick and thin pork chops with this recipe. If they are really thick I would bake them for a couple of hours on 300 degrees covered in foil. If they are thin, bake 45 minutes covered.

                      Bake your finished pork chops in a foil covered dish for 45 minutes to 1 hour if they are thin, 90 minutes if thick.

Mushroom Gravy
1 can cream of mushroom soup
1 cup sour cream
1/4 cup White wine or sherry 
1/2 to 3/4 cup milk
pepper and seasoning salt to taste
1/2 cup mushrooms sauteed in butter and garlic for 5 minutes
You don’t need much salt as the soup is very salty already. Then pour it over your chops after they’ve baked for 45 minutes.  Let them bake another 15 minutes covered.  When they are done they should be pretty tender and very moist. The gravy is the best part so you can double the recipe if you are having mashed potatoes to go with your pork chops. Yummy. Enjoy!

Pork Chops in Mushroom Gravy – I think we did these over rice, but Mashed Potatoes are great too!

    Zucchini Recipes (Zucchini Chicken Chili)

    Zuchini Chicken Chili

    My good friend Launa brought my hubs and I over some of her hub’s garden goods; a few of these yellow squash and zuchinis. I love zuchini and my hubs loves yellow squash, but neither one of us had grown or seen these yellow zuchini before. Aren’t they so pretty? I had to use them tonight in something.

    Chocolate Chip Zuchini Bread and Chili are how I used up these garden veggies!

    So I came up with a chili that I added the yellow squash to. It was really good. I had some leftover roast beef I used, some fresh tomatoes from the garden, corn off the cob and some leftover taco meat and leftover Jimmy Dean sausage I had frozen in a zip lock baggie.

    Stir fried up the veggies and added the yellow zuchini to the mix…..I didn’t have any corn so I added carrots instead. I use up whatever leftover veggies in my fridge with this chili. It’s healthy and spicy too!

    But not as spicy as this yummy Apricot Zucchini Bread I also made with the yellow Zucchini! Check it out HERE.

    It was one of those nights where I just wanted to throw things in a pot and simmer it for an hour while I was finishing the wall painting in my master bathroom.We are remodeling again. Oh Crap!!

    This is kind of the “Before Picture”.  I’ll be done with this in another day Woo Hoo!

    We are down to the last 2 bathrooms and we have finished the tile floors. Now we just need to add granite countertops. I can’t wait!

    Add a packet of Lawry’s Chili seasoning and some salsa to ground or shredded beef or cubed chicken.

    Anyway, here is another use for zuchini!  Taco Chili

    1 1/2 cups of diced chicken or fried & drained ground beef
    (or shredded….I use whatever I have on hand)
    1 small or 1/2 medium onion diced and sauteed for 8 minutes in oil/butter mixture
    1/4 cup green or red pepper sauteed  with the onion
    1 cup diced tomatoes or use a can of stewed, diced tomatoes
    3/4 cup corn off cob or frozen yellow corn (or another leftover veggie)
    1 can kidney beans
    1 can chili beans (I don’t drain the liquids)
    1 quartered and sliced zuchini (small) yellow or green
    1 packet of Lawry’s chili mix (found in the spaghetti and gravy packet aisle)
    1/4 cup fried up ground Jimmy Dean sausage spicy (Optional) I usually have some leftover frozen from doing sausage breakfast burritos.

    Zuchini Chicken or Beef Chili….it’s soooo good!


    Fry up your onions first and then throw the green pepper in. While that is sauteed, fry up your ground beef and drain off the fat. Then mix the two pans together.  Then cut up your tomatoes, and zucchini and 1/2 can of corn or 1 cup of fresh or frozen corn, and dump them all in, your packet of chili mix and your beans. Let it all stew together for 15 minutes on medium heat,  I rarely ever have to add any more spice to this.

    You can also add in any leftover veggies or spanish rice. It is kind of a “use up my leftovers” dinner. But BOY oh BOY those yellow zuchini look and tasted great! And my chili goes great with corn bread too!

    Homemade Mini-Tostados (Tacos in a mini shell)

    We went out to a new Mexican restaurant, my friend Marsha and I. We ate this weird thing called a “deep fried avocado” and it was pretty good. Not great, but good. It was too dry for me.


    Oops! I took a picture of enchilada seasoning packet. It’s supposed to be a Taco Seasoning packet! 

    But it WAS pretty ingeniously made. I was in awe of how they did it!  It was filled with some spicy chicken and that was it. The avocado was peeled and sliced in 2 and filled with the meat. Then a dough was wrapped around the outside and deep fried.
    Stuffed avocado
    I think I prefer my tacos in some kind of hard, crispy shell. I’ve always liked tacos much better than soft burritos. I just like the crunch better. So I love hard shell tacos better than soft tacos. But I did LOVE the avocado taste in with the spicy taco meat. So I’m going to do some crispy shell tostado shells with taco meat and yummy veggies inside.

    I’m going to season my meat with salsa, a taco seasoning packet AND a tiny can of diced green chilis.

    Maybe make some guacamole to put on top of your mini tostados. Just smash an avocado, add some salt and pepper, some lime juice and a few diced tomatoes. It’s yummy as a topping!

    But I would rather have corn tortillas. So I am going to try some version of the avocado spiced up with meat but with  some veggies and cilantro added for flavor and moistness.

    Taco OR Tostado meat is super easy and can be used as a basic recipe for so many mexican dishes.
    Then start frying up your corn tortillas in a little canola oil in your frying pan. Blot them dry on paper towels.

    I used ground beef, fried up and drained, then I added a taco seasoning packet and some salsa and simmered it for about 6 minutes. 

    After the meat is done add a small can of diced green chilis. It just MAKES the taco meat mixture so much BETTER!

     After your tortillas have dried a bit lay them over an upside down mason jar. place a paper towel over them. Then put a larger cup or measuring cup or bowl over the top and press them down to the shape of the mason jar. They should look like this after about 5 minutes.
    I’ve made my own corn tortillas before with a tortilla press. They are even MORE yummy than regular tortillas from the grocery store. They are more time consuming though. But check out my tutorial HERE!

    Here are my homemade tortillas. Check out the tutorial HERE.  There’s nothing like a hot, homemade, corn tortilla!

    Here is what the store bought ones look like when  your mini tostadoes are all done!

    Ingredients for Taco/Tostado meat:
    Serves 6 to 8
    1 1/2 pounds of sliced flank steak spiced with Montreal Steak Seasoning and grilled
    OR ground beef fried up and drained (either or, just depends on the time and $ you want to spend)
    1 Cup of finely diced, medium salsa
    1/2 (or more) cup water
    1 small can diced green chilies
    1 Taco Seasoning Packet
    Let simmer for 10 minutes on low stirring occasionally. Add more water or salsa as desired.
    Mini handmade tostado shells are fun and so easy! Great for a kid’s party!

    Use a larger bowl or measuring cup to press down over the shells laying on the mason jars. That will help them keep their shape.

     So, just press the tostado shells down and remove the cup and do another one. They will dry and keep their shape under the paper towel. 
    Get your toppings ready, we are about done!
    Fill each of the cute little tostado shells with meat and then let everybody do their own fillings!

     Put out some chopped tomatoes, olives, lettuce, cheese, sour cream, salsa, corn, avocado, fresh cilantro, whatever you like! It’s FUN to do a taco/tostado bar for an easy KID’S party too!  Kids LOVE to do it themselves.

     This is how I like my mini tostados in a homemade shell. If you have some cute tiny bowls like this it is even better! You can also use clear custard dishes to set them in.

     Or even just plates since they really will keep their form once dried.

    My grandkids love tacos in a tostado shell. They are so sweet, aren’t they? And they are yummy too!

    Mandarin and Cranberry Chinese Chicken Salad

    Chinese Chicken Salad with oranges and cranberries!

    I’ve had this salad many different ways but this is my favorite way to have it. I use cabbage, Ramen Oriental Noodles, sliced almonds and mandarin oranges and dried cranberries. I make the dressing with oil and rice vinegar and sugar and the noodle seasoning packet. It always turns out delicious, crispy and fresh looking. And the best part is…..it will feed a huge crowd!

    I love this crunchy Chinese Chicken salad! You can add green onion to each serving if you like it. 

    I like that it is super easy and quick too. When I’m not in a cooking mood I usually pick up a cabbage and have some chicken breasts in the freezer, and those ramen noodles last for like 10 years in your pantry so I buy them in bulk…. a whole box at a time. We usually use them up in a year.  I also buy all my nuts  from Costco in bulk, so I know I’ve got my ingredients on hand.

    Mandarin oranges, Ramen noodles raw, sliced almonds and dried cherries go into my Chinese Chicken Salad. I got dried fruits at the downtown Farmer’s Market.. …Yum! 

    Chinese Chicken Salad Recipe
    1 medium cabbage chopped coarsely
    2 packages ramen noodles broken up (oriental style) reserve the 2 packets of sauce mix
    1 larger or 2 small cans mandarin oranges (add them just before tossing salad)
    1/2 cup sliced or slivered almonds
    1/3 cup dried cherries or cranberries
    3 chicken breasts cooked and diced into chunks
    green onion for garnish.

    This dressing is really flavorful and tart….

    Delicious Asian Dressing

    2/3 cup canola oil (I’ve used olive oil and I don’t like it as much)
    1/3 to 1/2 cup rice vinegar (or apple cider or red wine vinegar but I prefer the rice vinegar)
    1/4 cup sugar
    2 seasoning packets from the Oriental Ramen
    pepper to taste
    1 Teaspoon of lemon or lime juice (optional) for a zingy flavor
    A shake of Lawry’s season salt if needed (or Johnny’s season salt – get at Costco)

    Break up the Ramen Noodles in the chopped cabbage and fruit and sliced almonds…
    Then add the dressing  and chicken for the Chinese Chicken Salad, and toss a few times! 
    That’s it!

    Whisk the dressing  up in a small bowl till sugar is dissolved. Taste it.. if it is not flavorful enough add a dash of rice vinegar…not sweet enough add a shake of sugar, not seasoned enough add a shake of Lawry’s Season Salt.  I can’t remember a time I have not messed a little with homemade dressing of any kind. You get better at it the more you make it.

    These plates are so cute for a summer Chinese Chicken Salad, aren’t they?

    Here is my finished salad. It’s delicious on a warm, fall day when you don’t want to cook!  Great with homemade muffins or some rustic, crusty bread and butter.And how do you like my new stoneware? It’s from Smiths Marketplace!  I bought a set of 12 with bowls too. I think they will look cute in the Spring and Summer for dinner parties. It was a buck a plate! I think it’s so pretty! Boo yah!

    Apricot Zuchini Bread (with chocolate chips)

    Apricot Zuchini Bread (with chocolate chips!) 

    I had these wonderful yellow zuchini I wanted to make something sweet with.  I also wanted to use up some of the apricots from my tree that were really ripe and almost mushy. And I love chocolate chips (what’s not to love?). And I also had lots of leftover cuties that I needed to use up before they dried out in my fridge. So here is what I came up with. It is a basic zuchini bread recipe for 2 loaves. I doctored it up a bit to use up my fruits and zuchini. It turned out wonderful!

    Yellow Zuchini is so pretty and looks great in soups and salads too! 

    The yellow zuchini tastes the same as regular zuchini but it is just so darned PRETTY! It’s such an easy veggie to grow too! Here is a yellow squash that my neighbor brought over. Her hubs is a green thumb! Me, not so much…..

    But we did get some great apricots off of our tree this week. I picked about 20 the other day. They are so yummy!

     We have been working so hard on our yard this summer. My hand is kind of stiff from hours of weeding yesterday morning. But the front yard sure does look tons better! (And we actually finally took down the Christmas lights and here it is JULY!

    Apricot Zuchini Bread…..mixing it up was a snap!

    Almost ready to bake….I just HAD to add chocolate chips. The hubs said it’s better without…..(what’s wrong with that guy…better without CHOCOLATE?) well….maybe….

     Yeah, we are not a driven, organized team. We are lazy and most Saturdays we love to go and play, not do things we really SHOULD be doing (like cleaning out the garage, you can’t even walk around in there anymore!) EEK!

    I have heard of orange zest in sweet breads but I had never tried it. It is a fun little hint of a taste that adds a little something to your bread, but it is entirely optional! 

    Everything is better with chocolate!

     Zuchini Apricot Bread (with Chocolate Chips)

    2 1/4 C flour
    1 1/2 t cinnamon
    1/8 t nutmeg
    1/2 t salt
    1 1/2 t baking soda
    1/4 C canola oil
    1/4 C butter
    3/4 C granulated sugar
    1/2 C brown sugar
    3 eggs
    2 t vanilla
    1/3 C sour cream
    2 1/2 C grated zucchini
    2 apricots diced fine
    2/3 C chopped walnuts
    3/4 C chocolate chips
    zest from one medium tangerine or small orange (optional) 

    Zuchini bread is a great way to use up your garden zuchinis! And neighbors really like it too! 

    Cream butter, oil, sugars and eggs together. Add vanilla. Then grate zuchini and add in with the apricots and sour cream. Then add salt and soda to the flour mixture and dump that in. Mix well. Then add cinnamon and nutmeg, walnuts and chips one at a time.  Spray 2 bread pans with Pam. Pour batter in pans evenly. Bake at 350 for 55 to 60 minutes. Let bread set for 10 minutes on cooling rack before slicing. Mmmm….it’s SO good.

    Apricot Zuchini Bread….it turned out so yummy!

    Homemade Kool-Aid Playdough

    It rained a ton last night and today it was muggy and hot outside so I wanted to think up something fun to do with my granddaughters while I was babysitting today.

    Making Playdough out of Kool-Aid is so easy, I’ll never buy it again!

    I had bought a pile of Kool-Aide packets to make playdough for my classroom kids last summer but I never got around to it. And that stuff was still up in the cupboard. So we pulled them all down, chose our colors (flavors!) and mixed up a batch in about 2 minutes! Seriously, I’m not Kidding! It was FAST!

    There are only 5 ingredients in Kool-Aid Playdough besides the water……
    My Granddaughters picked out their favorite Kool-Aid flavors for the Playdough.

    It took me about 2 minutes to mix up the Kool-Aid Playdough! Super EASY PEASY!

    It is soooooo super quick and easy. It calls for the playdough in the mix before adding the hot water, but I wanted to divide the one batch into 4 colors. So I experimented with it to see if we could add the Kool-Aide after it was all mixed up.

    Kool-Aid makes great Playdough….it smells so good!

    Here were the colors we chose today for our Kool-Aid Playdough.

    Do you think they’re getting excited to start mixing them up? Oh yes they were!

    This is the before picture….nobody has rainbow fingers yet. 😀

    It worked fine except for one thing; all our fingers were rainbow colors! It dyes you fingers pretty good, but after a few washes you can’t even tell. I should’ve taken a pictures of our rainbow fingers!   What fun we had! And the playdough smells yummy too!

    Meg chose Orange and Cherry-Red for her Kool-aid Playdough!

    Marisa chose purple-grape and blue-raspberry Kool-Aid for her Playdough.

     KOOL-AID PLAY DOUGH RECIPE
                                     
    2 1/2 cups flour
    1/2 cup salt
    2 pkg kool-aid (unsweetened)                           
    2 tablespoons cream of tarter
    Mix together then add in:
    2 cups boiling water
    3 tablespoons oil

    Mix and knead for 4 minutes or until cool. 
    We mixed it all in the Mixmaster for 4 minutes
    then separated it into 4 bowls. Then we dumped
    the Kool-Aid into each bowl so we’d get 4 colors! 
    Such a great rainy day activity.

    Make some soon!